 >
>  The data in a CSV file (CSV stands for "
Comma-separated values
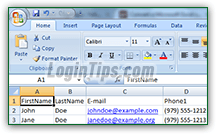
") is an ideal fit for Microsoft Excel, because they deal with the same type of data: "tabular", meaning that it's organized in rows and columns. But Excel offers all kinds of functionality not available in plain-text format, which CSV essentially is: that includes colors and formatting, remembering the width and height of your rows, charts and embedded pictures, and even multiple worksheets inside a single Excel spreadsheet file. That's why it generally isn't feasible to work directly in CSV format within Excel. But you can convert your worksheet into CSV, and export it right from Excel. This tutorial covers the last five versions of Excel: 2013, 2010, 2007, 2003, and 2000. (Everything should work exactly the same way in Excel 95 and 97, but we don't own a copy of those for testing purposes :)
Important: Excel only exports the current worksheet, so make sure that what you're seeing on the screen is what you want to export. To switch worksheet, use the tabs at the bottom. To export all worksheets to CSV, repeat the steps below for each one (you'll end up with multiple CSV files).
Quick Steps to export an Excel spreadsheet to a CSV-formatted file:
The procedure is essentially the same for all versions of Excel, once you've reached the "Save As" dialog. Here's how you get to it for each version of Microsoft's spreadsheet application:
| Excel 2003 | Excel 2007 | Excel 2010 | Excel 2013 |
|---|---|---|---|
 Click on the File menu and choose "Save As". Click on the File menu and choose "Save As". |  Click on the Office orb (button in top left corner) and click on the "Save As" button (not its right arrow!) Click on the Office orb (button in top left corner) and click on the "Save As" button (not its right arrow!) |  Click on the File tab and select "Save As". Click on the File tab and select "Save As". |  Click on the File tab and choose "Save As" on the left. In the " Click on the File tab and choose "Save As" on the left. In the "Backstage View", select Computer and choose a destination folder. |
Tip: in all versions of Excel, you can use the following keyboard shortcut; in Excel 2013, it will only open the "Save As" screen in Backstage View. Hold down the Alt key on your keyboard and the hit F key, for "File" (while still holding down the Alt key). Release it, and type A.
Type something meaningful in the File name text box for your CSV file. (We called ours "My Contacts as CSV
", because this is a very common scenario: exporting an address book to CSV so that you can import it back into a desktop email program or upload it to a webmail provider's address book!) From the "Save as type" dropdown, select "CSV (Comma delimited) (*.csv)" and click Save: 
Depending on the type of formatting used inside your Excel spreadsheet, you may get a message warning you about formatting information being potentially lost. Don't worry about it, and proceed. Now close Excel; if asked, no need to save any changes made to the CSV file opened in Excel.
FYI: "saving as" can be a bit confusing at times. The file in front of you in Excel is the CSV file, no longer the original spreadsheet. So any changes you make would be made to the CSV. Also, next time you start Excel and want to re-open your original spreadsheet, the most recent file will be the CSV, not the spreadsheet (it's easy to mistakenly open the CSV if you gave both the same name!)
 You can now double-check the content of your comma-separated file: go to the folder in which you saved it from Excel. If you double-click on it, it will probably open with Excel, so right-click on the file instead, and choose "Open with..." - and pick Notepad from the list of programs (any plain-text editor will do).
Unlike opening it in Excel, which would show rows and columns, using Notepad will show you exactly how your CSV file is "constructed", behind-the-scenes. The first line contains -typically- the headers, which describe the type of information that appears in the corresponding column. And each line (assuming word/line wrapping is turned off), corresponds to a unique row of data. Here's an example of a CSV file in Notepad (several commas in a row indicate empty values). 
Close your text editor - if asked, do NOT save any changes. You now have the CSV file you needed!
Note: by default, Excel only adds single-quotes or double-quotes when they are needed. This is fine for just about any scenario in which you'll import the CSV file. If you need to have every field quoted, however, you'll need to write a macro to automatically add those: here's an example.


