 >
>  >
>  If you didn't add a phone number to your account when you first signed up, it's ok: not only can you add a cell phone after the fact, you can even have multiple phone numbers tied to the same account. Better still, the same mobile phone can be associated with multiple Hotmail / Outlook.com accounts. Having a mobile phone associated with your account means that password recovery just became easier, and that logging into your account from a public computer or unfamiliar location just became safer! Microsoft can now send one-time passwords to your device (these are known as "single-use sign in codes", and will not work if someone tries them after the first use!)
Tip: you can add different phone numbers to the same Microsoft account, and the same number can be used for different accounts. The end of this tutorial shows you how to remove a phone.
Quick Steps to setup a cell phone in Outlook.com:
 Once you are logged into your account to which you want to connect your cell phone, click on the Settings button (gear icon in top right corner), and choose "Options" from the dropdown menu.
 On the next page, click on the first link, labeled "Account details (password, addresses, time zone)". It will open a new window, and ask for your password unless you just logged in (as security measure). Select the "Security & password" section on the left, and click on the "Add a new phone number" link in the right pane.
In the next screen, confirm that the selected country / prefix matches your phone (this information is taken from what you supplied when you signed up for your account). In the next text field, type your full cell phone number, including area code. You can receive your verification by SMS text message (keep "Text" selected), or with an automated phone call (select "Call"). Click Next. 
Within seconds, you'll receive a "Use {1234} as Microsoft account security code
" message; if you haven't received anything, click on the "I don't have a code" link in your web browser to get a new one. Enter the four-digit confirmation code, and click on the Next button. The number will be added to your account, and you'll be redirected to the previous page (which now shows your cell phone!) 
From now on, you'll be able to use your cell phone for various features, including the generation of one-time passwords when you login to your account from an unknown computer or from public places like airports, hotels, etc. See our tutorial on signing into Hotmail with single-use codes.
Note: another security feature to look into is "two-step verification", as Microsoft calls it. You can require an additional password in the form of a six-digit code whenever someone tries to log into your account, and you can add exceptions for the browsers you trust and use often (like your home computer or laptop). Go turn on two-factor authentication for your Outlook.com account!
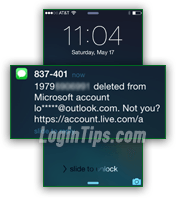
If, for any reason, you want to dissociate your cell phone from this particular email account, follow the same steps outlined earlier: go to Settings (gear icon) > Options > Account details, and select "Security & password" on the left in the new window. Click on the Remove link next to your phone number, and click on the Remove button in the delete confirmation popup:  Once the phone is successfully dissociated from your account, you'll get a last "
{phone number} deleted from Microsoft account {email}@outlook.com
" confirmation sent as SMS text message.
Important: before you go through the hassle of having to re-verify a cell phone number after you've deleted it from your account, know that you can associate multiple numbers to a single account, and that you can associate the same cell phone with multiple Hotmail / Outlook.com accounts.

You associate a second phone number to one of your accounts through the same screen. Just click on the "Add a new phone number" link below your phone and alternate email address you added:


