 >
>  > > >
> > >  While Skype (now owned by Microsoft) has become the latest instant messaging / chat client, Windows Live Messenger is still installed on millions of PCs in the world, and used by a loyal fan base. If you have an MSN / Hotmail / Live.com / Outlook.com email address (or any type of Microsoft account, to make this statement future-proof!), you're all set, and you can use it as username for Messenger. And if you have Windows Live Essentials installed on your PC, Messenger should already be installed as well! This tutorial shows you a couple of settings related to signing in - like how to handle your online status, and whether to automatically start with Windows.
Tip: a later tutorial will cover signing into Windows Live Mail. That email program, also made by Microsoft, can optionally be tied to your Microsoft account: logging into Mail can automatically log you into Messenger. Both apps belong to the same "Windows Live Essentials" suite.
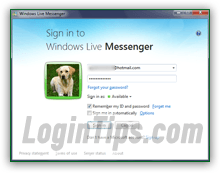
Quick Steps to log into the Windows Live Messenger client:
To login using a Hotmail account with which you've already signed in the past, no need to supply your username and password in most cases! Just click on the dropdown arrow and select another email address: your credentials will automatically be entered - if not, manually enter your password. 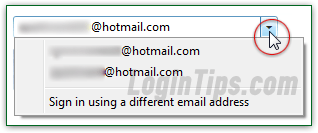
To sign in as another user (not listed in the dropdown), choose the "Sign in using a different email address" option at the bottom of the menu. Then, manually type-in your full email address, and password. (You'll learn a bit further down how to add a new username to the dropdown!)
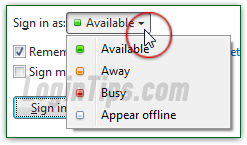 By default, Windows Live Messenger will log you in with the "
Available
" status, which means that you'll be visible to your friends (contacts). To change that, click on the "Sign in as" dropdown menu, and pick "Away
", or "Busy
" To login but stay invisible, choose "Appear offline
" (people won't even know you're logged in with that status!) From the standpoint of human relationships, it's probably best to avoid saying that you are "busy"! If you don't want to or cannot chat, either say that you are away, or appear offline.
If you are using your own computer (not a public machine or a shared PC), you can check the "Remember my ID and password" checkbox. This will spare you from having to manually enter your email address and password whenever you launch Messenger; if this checkbox is checked, whatever credentials you enter will be remembered in the username dropdown we saw earlier.  The "Sign me in automatically" checkbox makes Messenger login as soon as you start the app (and you can configure it to automatically start with Windows). Since you might want to change your online status before someone sees that you've logged in, you'd better leave that option disabled!
Read-on to customize your settings, or click on the Sign in button to start chatting with your friends.
FYI: notice the "Sign up" link at the bottom of the form? It conveniently opens a web page to launch the new account creation process, something we've already covered in another tutorial.
The earlier screenshot shows an "Options" link on the right of the "Sign me in automatically
" checkbox: clicking on it does the same as accessing your settings in the main program window.
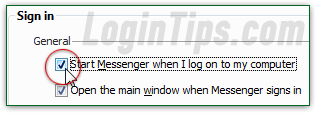 Leave the "Start Messenger when I log on to my computer" checkbox checked if you use the program regularly, and are not running into slow computer issues (which often happens when too many apps are running at the same time!)
If you want to have Messenger run, but only use it when you are ready, uncheck the "Open the main window when Messenger signs in" checkbox.
Under "Sign in at more than one place
", Messenger lets you get notifications when you are signed into your account from different computers and/or mobile devices. Check the "Show me all the other places I'm signed in at when I sign in" checkbox to receive these notices: 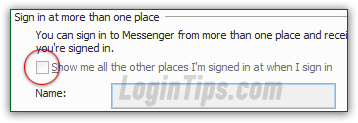
 Select the "
Personal
" options on the left: The "Show me as 'Away' when I'm inactive for [x] minutes" checkbox is checked by default, with 5 minutes as the default value. Uncheck that checkbox to keep control over your busy status, or change the duration to something longer if you want. Your "inactivity" is measured by the last time you typed, clicked, restored / maximized the window, or moved your mouse over Messenger.
Tip: The second checkbox (Show me as 'Busy' and block my alerts) is useful if you are running a game, for example (Messenger will stay quietly in the background), or a PowerPoint presentation. We recommend that you leave it checked: otherwise, Messenger may pop up to the foreground while you are busy with something else - that can quickly get aggravating!
Click OK to save your settings and return to Messenger - you are done!
